|
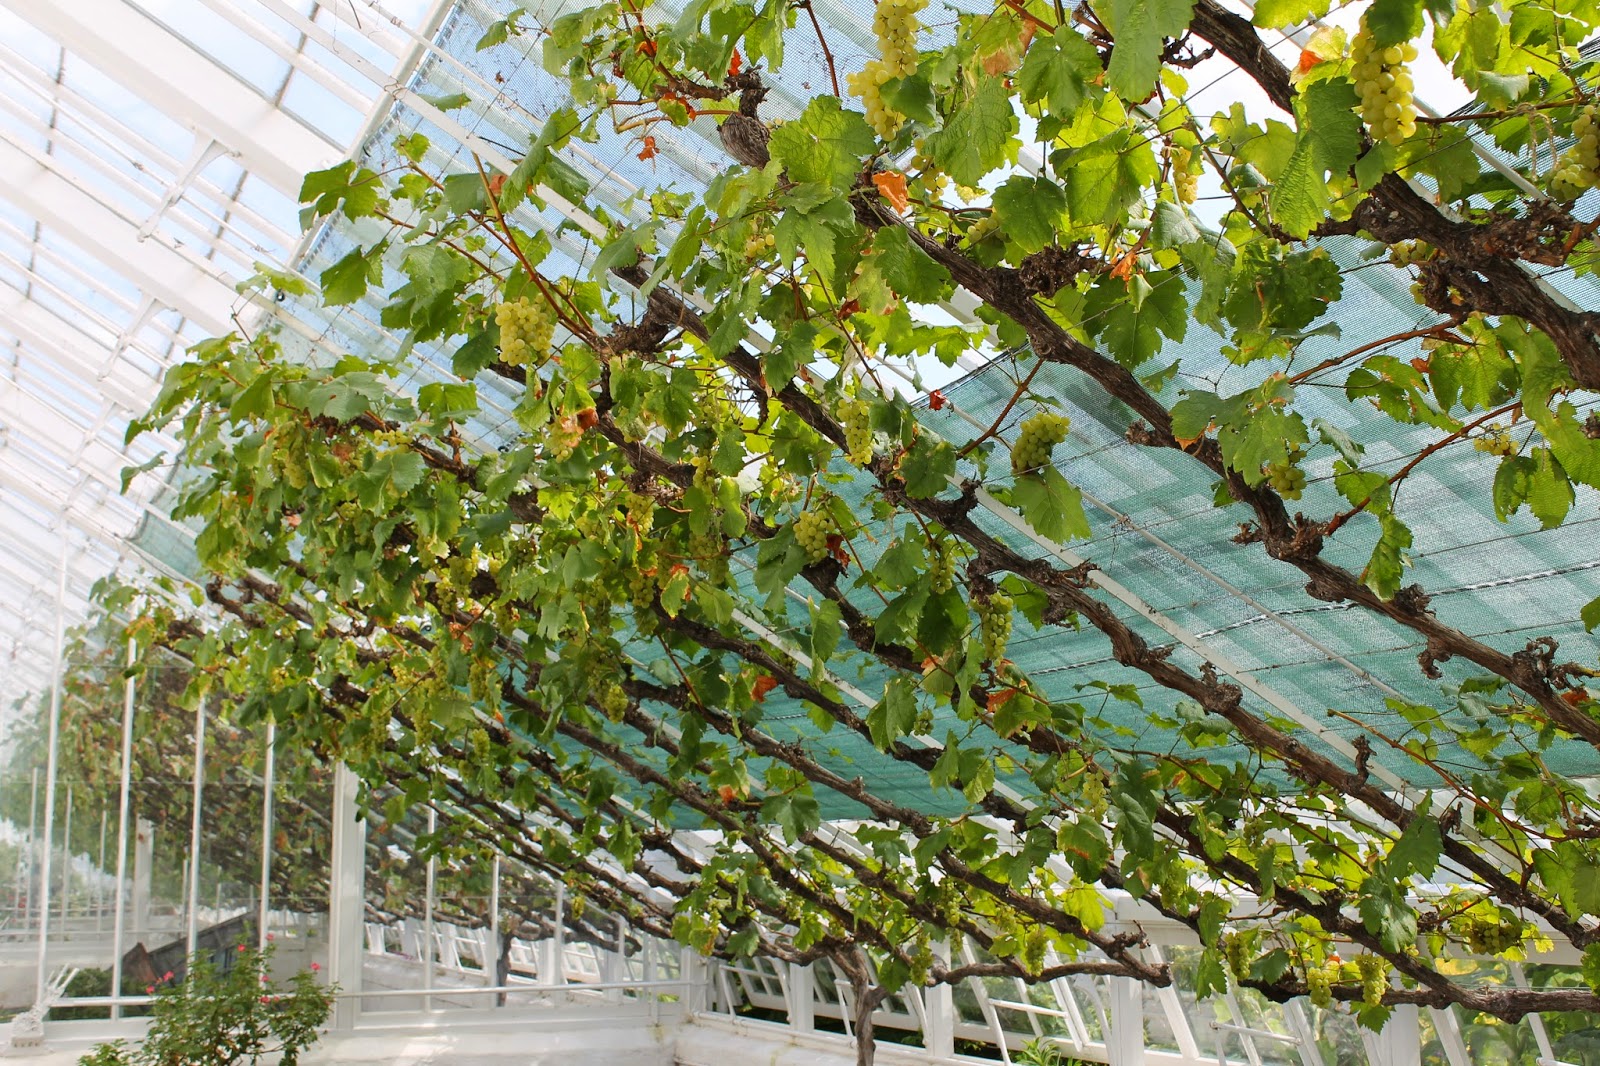
| The Hampton court vine |
Grapes are one of the most popular of all edible fruits, and there has been evidence of their cultivation as far back as 6,000–8,000 years ago in the Near East. Be that as it may, they were not introduced to the Britain until the Roman conquest in AD 43 under Emperor Claudius.
 |
| Image credit - http://www.jibberjabberuk.co.uk/ |
Despite the creep of global warming, many of the popular dessert grape cultivars perform poorly in the cooler northern European climates. So to encourage a more flavoursome crop they will need to be grown in a protected environment - such as a greenhouse or polytunnel.
When growing in greenhouse borders, make up a bed from a mixture of 3 parts loam to 1 part well-rotted farm manure by volume. Plant out pot-grown grapevines in late autumn or winter (preferably around late October) at intervals of 3-4 ft. Train the plants against wires, which will need to run the entire length of the greenhouse, attached to the frame every 10 ft or so, 6 inches away from the glass. The wires will require a vertical spacing of approximately 12 inches. water the young plants liberally over the first season to encourage as much growth as possible, but only allow one stem (known as a cordon or rod) to develop.

In their first autumn (when the leaves have changed colour, but before they fall), remove half to two-thirds of the growth of the first year rods, cutting back to a bud on well-ripened wood. The following spring, train the leading shot up, and the laterals along the wires on alternate sides. After flowering, stop the laterals at two leaves beyond the fruit clusters and remove an further subsequent shoots (known as sub-lateral shoots) at one leaf. Remove all other shots by rubbing them off the stems, and allow only 2-3 bunches of grapes to set in the first cropping year.
In the autumn, remove one-third to a half of the new growth for that year, back to well ripened wood on the leading rod. Cut these selected laterals back to 2 buds. These lateral shoots will form the basis for next year's fruiting spurs. Cut back the main rod and lateral shoots each autumn, for one or two more years to fill the available space and to build up a strong rod and fruit spurs.
 |
| Overwintering vines |
Rest the vines over the winter by providing full ventilation and allowing some frost into the greenhouse. Apply a 5% tar-oil winter wash to the rods while they are dormant and renew the top inch of border soil. Untie the rods in late January and let their tops arch over unimpeded to encourage even breaking of new shoots along their length.
Come February, and it is time to warm up the plants in readiness for spring growth, so close the windows and door to help retain the available warmth. Tie the rods back into the supporting wires and wait for the buds begin to break, Most grapevine cultivars will not require additional heat, however varieties such as 'Madresfield Court' and 'Muscat of Alexandria' need a longer growing season and will produce a better flavoured crop if kept at a temperature of 10-13 degrees Celsius. Syringe the rods freely with tepid water in the mornings to encourage bud break and maintain humidity until the buds indeed finally emerge. Once the buds show on the stems stop syringing and begin to improve ventilation, especially on warm days.
 |
| Black Hamburg grapevine |
When the young shoots are about an inch long they can be thinned out to just two per spur, and when these are 3-4 inches long remove the weaker of the two.
Maintain a humid atmosphere, especially on hot, sunny days, until flowering begins, Once blooming commences, Ventilate freely,the flowers are unlikely to be naturally pollinated in the greenhouse and so pollinate by hand using a soft brush.
Thin the resulting bunches of fruit to one bunch of grapes for every 12 inches of lateral stem. As each berry begins to swell, cut out any small or overcrowded fruits in the centre of each bunch to improve its shape. Maintain a minimum temperature 18 degrees over the growing period and dampen down the floor regularly to maintain humidity.
Feed the grapevines with a water soluble liquid fertiliser or water in proprietary dried blood at 1/2 ounce per sq. yard every 10 days until the fruits have ripened.
When about half grown, the fruits will cease swelling temporarily while the seeds develop. During this period try to avoid fluctuations in temperature and humidity. As the fruits begin to ripen, increase ventilation and reduce humidity Once you have harvested your grapes, reduce watering and provide maximum ventilation. Remove all sub-laterals to help ripen the laterals.
For related articles click onto the following links:
HOW TO GROW GRAPEVINES IN A GREENHOUSE
HOW TO GROW SHARON FRUIT - Diospyros kaki
HOW TO GROW VITIS VINIFERA 'PURPUREA'
HOW TO OVERWINTER GRAPEVINES
WHAT IS GRAPESHOT?